Designer: Hoop, Poi, Staff
Save/export .bmp file in Gimp (free image editor)
How Can We Help?
If you’re looking to use a free desktop-based image editor, check out and download Gimp. The software is free and available for your computer. There is a little bit of a learning curve but it’s a streamlined and powerful program with lots of online documentation for help and further image editing training and practice.
To save the file as a bitmap (.bmp) you need to export it into this new file format. This will ‘save’ your newly exported bitmap image file.
After completing editing, select: File > Export As in the Toolbar
– Change the name of the image to: yourimagename.bmp
– Select the drop down menu to select the .BMP file format from the selection of image types
– Select where you want the file to be saved.
– Click Export button
There will be a new pop-up menu titled ‘Export Image as BMP’
– Open Advanced Options
– Select 24 bits
– Click Export button
This ‘saves’ your newly exported bitmap image file, which is now ready to use in your hoop!
———————————————
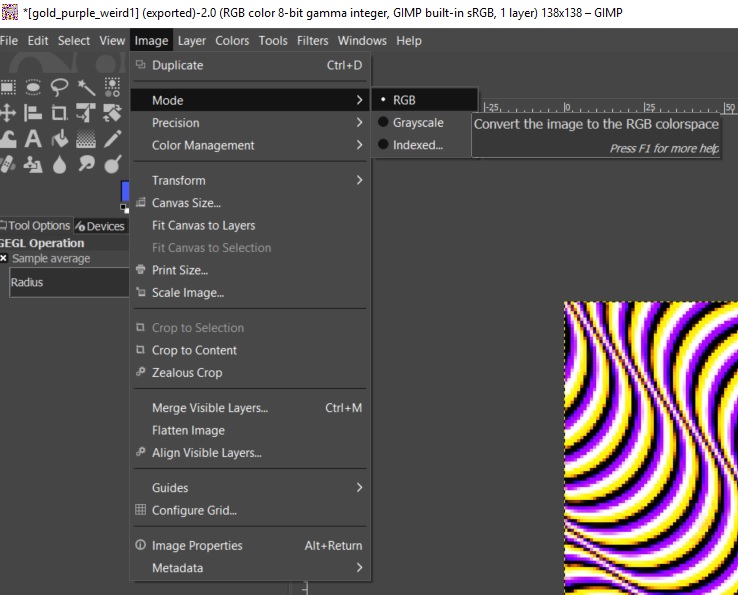
RGB Color vs Indexed Color – select RGB Color to Save File
If you’re trying to export an image with ‘Indexed Color’, you won’t be to export it into the correct bmp depth without a couple of extra steps.
You will know it is not in ‘RGB’ color because when you try export the image the Advanced Options are unable to be selected.
Fix: Set the color to ‘RGB’.
Go to: Image > Mode > Select ‘RGB’.