Classic LED Hoops
Your hoop arrives partially coiled and may look like 2 hoops. Please follow these important steps to properly uncoil your hoop.
- Clip off the zip-tie located across from the connection point. Do NOT unfold the hoop into a figure 8. Doing so will cause damage to the tubing that is not covered under warranty.
- There is a small piece of tubing over the ends to keep the hoop coiled down while in the box. Carefully slide off that piece of tubing.
- If there is a sticker over the snap button, remove it.
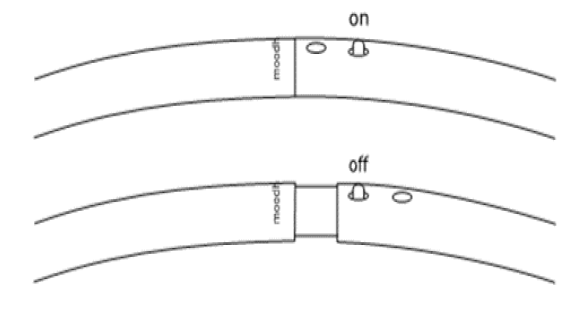
- Carefully uncoil your hoop, press down the snap button, and insert one end in to the other. Make sure the snap button pops up inside the hole after insertion.

Use only one battery at a time to power your hoop. Never insert your battery backwards. The side with a + label indicates the positive terminal After closing the hoop and turning it on, give the connector a little tug to make sure the snap button is in a fully locked position and won’t come open while hooping.
Troubleshooting
Difficulty opening and closing your hoop? Wipe off any dirt or debris on the connector, then apply a small amount of lubricant like petroleum jelly, lip balm, etc. Wipe off any excess.
Hoop is lopsided or misshapen? It’s normal for your hoop to become a little lopsided while coiled or in storage. Before a hooping session, gently flex and work the tubing back into a circle for a superior experience. The tubing may also warp if left in a hot place like a car in the sun.
Battery sticking when trying to remove it? Squeeze or flex the end of the hoop with your hand/palm and your battery will slide out easily.