Please read & follow all battery usage, charging, care, & warning tips in this guide, on the carrying case and on the battery to maintain the life of your battery, as well as for your own & others' safety and property.
These instructions apply to hoops with removable batteries, as charging, insertion & transport can affect the battery condition.
These batteries cannot be found in local stores and need special care and proper storage. Normal store bought batteries (AAA / alkaline batteries) do not have enough power and will not turn on your hoop.
Lithium-ion Battery Safety & Care
Hoop batteries are specialty batteries with a high-power capacity and have (x3) three times the power of normal store-bought batteries. That's how they have enough power to light up your hoop!
- Using a hoop powered by lithium-ion batteries is done at your own risk.
- Damaged or ruptured batteries can start a fire or cause personal injury.
- Batteries should always be used and charged under adult supervision.
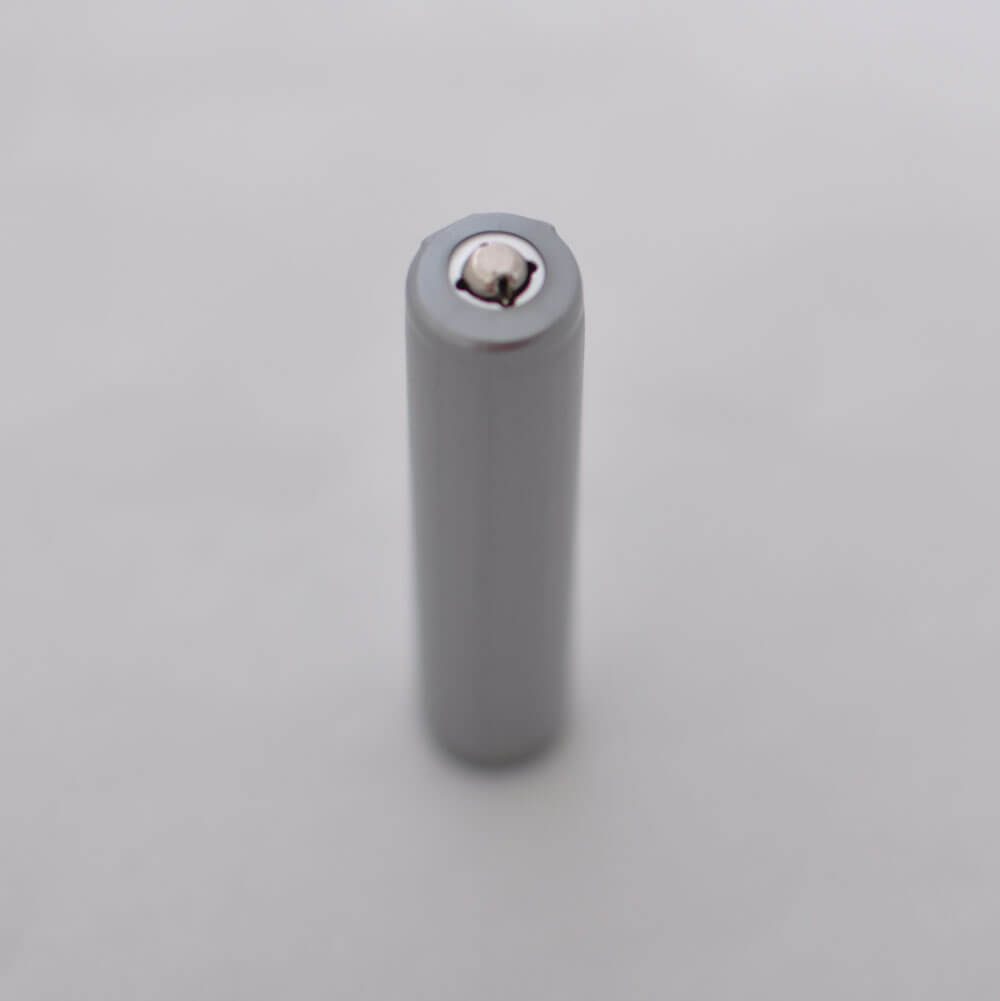
- Before use, always inspect each battery for damage to the protective outer wrapper, especially on the bottom & edges.
- Never remove the outer wrapping of the battery.
- Only use batteries from our shop in your Moodhoop.
- Never put these batteries into any other electronic device, including a different charger than the one that came with your hoop - this can damage the device and possibly start a fire.
- Do not store batteries in a hot car or in direct sunlight. Exposure to sunlight and heat can cause a battery to rupture!
- Do not heat, incinerate or reverse polarity (insert backwards).
- Keep batteries away from acidic, alkali, or other corrosive environments.
- Do not try to remove or touch a hot battery as it can burn your skin.
- If the battery compartment of the hoop feels warm, simply turn off the hoop and allow the battery to cool before removing it and properly disposing of it.
- Do not put batteries in a pocket, bag or purse with something metal, like coins or keys, as this can cause a short circuit and cause the battery to rupture.
- Keep your batteries in a battery case when being transported or when not inside the hoop.
- Transport all batteries in the provided plastic carrying case for safe storage and transport.
- Additional carrying cases are available here.
Do not use damaged batteries in your hoop! Inspect your batteries each time before use. Discontinue Use Immediately if:
- If the plastic is peeling off the sides, top or bottom of the battery
- If the circuit at the bottom of the battery is detached or falling off
- If the battery has been exposed to water or shows rust or discoloration around the positive or negative end of the battery
- If the battery leaks any electrolyte solution
- If the battery gets extremely hot or if the plastic peels off
Battery Safety and Battery Care go hand in hand!
- Keep in good condition to maximize your glow time.
- Follow all tips and warnings to avoid any safety issues.
- Get back-up batteries from our shop to keep you glowing!
- These batteries are consumable and will need to be replaced over time.
- Purchase new batteries when they start to show signs of wear and tear.
- Extra Batteries for the LED Hoop can be found here.
Lithium-ion Battery Charging
Charging Warnings
- NEVER LEAVE CHARGING BATTERIES UNATTENDED. ONLY CHARGE WITH ADULT SUPERVISION.
- Do not store the battery in the charger after charging is completed.
- Do not use the charger in a damp or wet environment, or on flammable surfaces, like carpet, furniture, or wood surfaces.
- Do not use any other battery charger than the one that came with your hoop.
- Chargers may become warm while charging. Use only in safe, designated spots, firmly plugged into a proper electrical outlet.
Charging Instructions
- Make sure the battery is seated firmly inside the charger, making full contact with battery terminals.
- When the battery is charging, the charger light will show red. Once fully charged, the light will show green.
- If the battery is almost done charging it's not uncommon for the charger light to flash in between red and green.
- Your battery may take 3-6 hours to recharge if it is fully drained.
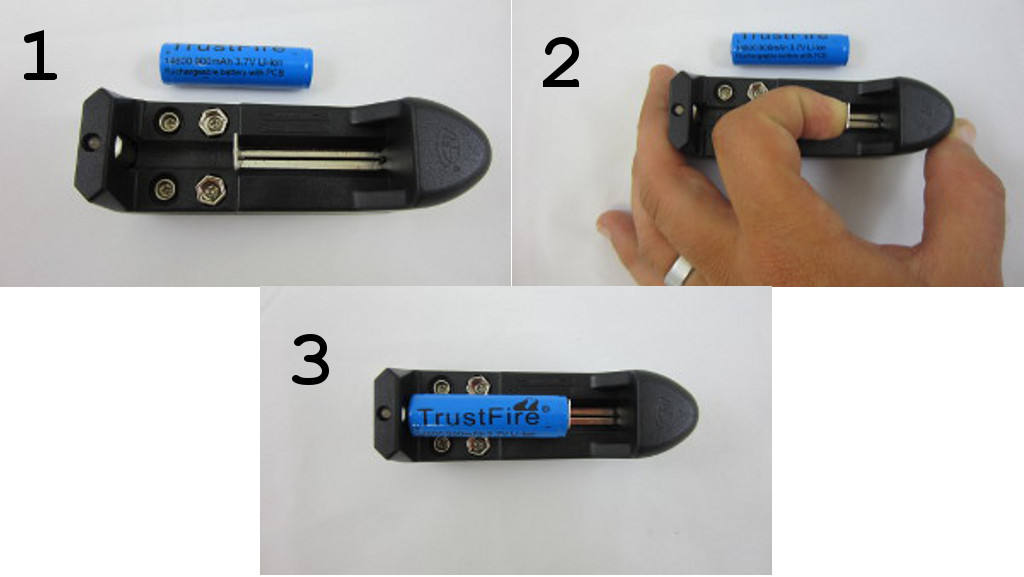
Single Battery Charger
When the charger is plugged in and there is no battery inserted the light will show as green.
Pull back the silver battery contact notch on the charger towards the top of the charger/away from the side with the light, to insert the battery. Once the battery is seated the contact notch will tighten around the battery to make full contact.
Single Battery Charger
Align the battery's positive end with the raised nob on the charger. If the battery needs to be charged the light will be red. Once the battery is finished charging the light will turn green.
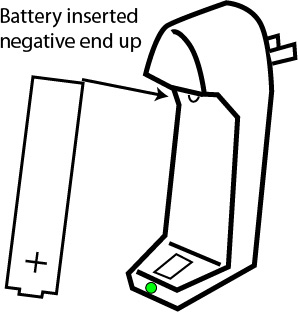
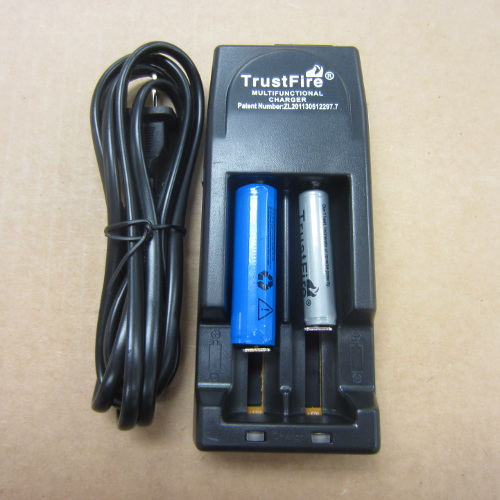
Double Battery Charger
This charger works by inserting the battery with the positive end facing up. Align the battery's positive end with the raised nob on the charger. If the battery needs to be charged the light will be red. Once fully charged the light will turn green.
Lithium-ion Battery Care
IMPORTANT CARE WARNINGS
- Avoid throwing or dropping batteries to keep the battery's plastic wrapping intact.
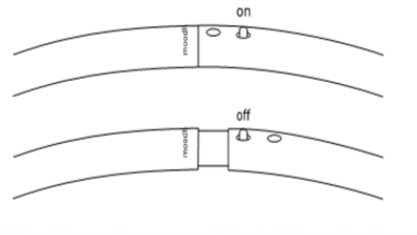
- Avoid hooping with the battery inside the hoop in the off position, this can damage the outer wrapping of the battery.
- Always store your batteries in their case when not in use or charging.
Keep your batteries charged in between hooping sessions.
- Do not allow your battery to sit without getting charged for extended periods of time.
- A battery that has sat without getting charged for a long time will lose its capacity, meaning it won't last as long in your hoop.
- It's not uncommon for li-ion rechargeable batteries to last only a few months or after only a few uses is left uncharged frequently.
- Ideal long term battery storage is between 35-65% charge.
Lithium-ion Battery Storage, Transport and Recycling Info:
- Lithium-ion batteries should be stored in the provided plastic battery case when not in use, being stored, or being transported.
- Do not ship damaged lithium-ion batteries through the mail.
- Do not ship any lithium-ion batteries through the mail without some kind of secure encasement.
- Do not dispose of damaged lithium-ion batteries into your trash can.
- Dispose of damaged lithium-ion batteries by taking them to your local hardware store, like Lowes, Home Depot, or to a Best Buy where they can recycled for free.
- Until damaged Lithium-ion batteries are ready to be dropped off for recycling, it’s best to keep the damaged batteries in the provided battery case, not stored in a hot car.
Battery Longevity
Batteries are consumable & will need be replaced at some point, especially if they are left uncharged for extended periods of time, similar to batteries in a smartphone.
Environmental factors from regular usage and manufacturing defects are out of our control and we cannot be held liable for any issues resulting from battery use, charging, handling, or storage.
FutureHoop Battery Guide & Hoop Specs
(on mobile: scroll left or right to see the whole chart)
Note: Battery run-times depend heavily on brightness level, pattern selection, and hoop size.
~~~~~~~
|
(All Models)
Standard
LED Density
Removable
battery |
(All Models)
Standard
LED Density
Internal
battery |
(Designer Only)
HD
LED Density
Removable
battery |
(Designer Only)
HD
LED Density
Internal
battery |
Main
Build
Feature |
longest
continual
battery
run time |
gapless
LEDs,
average
battery
run time |
sharper
resolution,
continual
battery
run time |
sharper
resolution,
mini
light
gap |
LED
Density
Image
Sharpness |
36 |
36 |
62 |
62 |
Hoop
Balance |
3-point
balance |
4-point
balance |
3-point
balance |
4-point
balance |
Light
Gap
from
Battery |
3/4:
gapless
5/8:
2 LED gap |
3/4:
gapless
5/8:
gapless |
3/4:
gapless
5/8:
4 LED gap |
3/4: 1 LED
mini-gap
5/8: 1 LED
mini-gap |
Battery
Run
Time |
Hours:
3/4: 1 - 2
5/8: 1 - 2.5 |
Hours:
3/4: 2 - 3
5/8: 2 - 3.5 |
Hours:
3/4: 0.5 - 2
5/8: 0.75 - 2.5 |
Hours:
3/4: 2 - 3
5/8: 2 - 3 |
Recharge
Power
Source |
removable
10440 li-ion
battery
(AAA-size) |
3 internal
batteries
charged
via USB |
removable
10440 li-ion
battery
(AAA-size) |
3 internal
batteries
charged
via USB |
Included
Charging
Accessories |
3 li-ion
rechargeable
batteries,
single
battery
charger |
1 USB
cable,
1 USB
wall
charger |
3 li-ion
rechargeable
batteries,
single
battery
charger |
1 USB
cable,
1 USB
wall
charger |
Recharge
Time |
2-4
hours
per
battery |
3
hours
plugged
in |
2-4
hours
per
battery |
3
hours
plugged
in |
Resize
Hoop
Size |
✓ |
✓ |
✓ |
✓ |
Resize
Tubing
Size |
X |
X |
X |
X |
Remote Control Battery & Responsiveness
- If your hoop's remote control isn't as responsive as you think it should be, try switching in a new battery, especially before performances.
- The 7-key remote has little lights behind the buttons that turn on when you press the button down. If the lights are dim or do not turn on when the button is pressed this is a good sign that the battery needs to be replaced.
- The CR-2025 battery used for the remote can be found in most gas stations, hardware stores, and grocery stores.
- These round batteries are often referred to as coin-cell batteries or watch batteries. These and similarly small sized batteries are also used for hearing aids and other small devices.
- Grab a 5-pack of replacement batteries for your remote here.
How to Change Remote Battery
To open up the compartment where the battery is, you'll want to squeeze the little black tab on the back bottom left of the remote in towards the larger black tab next to it. Squeeze the little tab in and pull the compartment out with your finger or nail, and it should slide out.
<img src="https://moodhoops-assets-1.nyc3.digitaloceanspaces.com/wp-content/uploads/2018/07/25002606/moodhoops-remote-control-battery-compartnment-510x510.jpg" alt="" width="510" height="510" class="aligncenter size-medium wp-image-249172" />